Defective Flue Tile Repair in Denver, CO
![]() Defective flue tile repair is one of those jobs Denver homeowners put off because they can't see the damage, and that's exactly what makes it dangerous. The flue tiles are the clay liner running up the inside of your chimney, and their whole job is to carry smoke, hot gases, and combustion byproducts safely up and out of the house. When a tile cracks or crumbles, that protective channel breaks down. Doesn't matter if you burn wood, run a gas fireplace, or heat with a wood stove. A bad flue puts your home and your family at risk, so keeping it in good shape really matters.
Defective flue tile repair is one of those jobs Denver homeowners put off because they can't see the damage, and that's exactly what makes it dangerous. The flue tiles are the clay liner running up the inside of your chimney, and their whole job is to carry smoke, hot gases, and combustion byproducts safely up and out of the house. When a tile cracks or crumbles, that protective channel breaks down. Doesn't matter if you burn wood, run a gas fireplace, or heat with a wood stove. A bad flue puts your home and your family at risk, so keeping it in good shape really matters.
This guide walks through how the repair actually works, what it costs, and why it's worth doing right. We've pulled the details from real jobs around Cherry Creek, Capitol Hill, and Five Points, so you'll see how a professional chimney sweep handles this kind of work day to day. If you're in Denver, CO and something feels off with your chimney, call Adam Chimney Sweep at (720) 207-9232. We do free chimney inspections, and we'd rather catch a small crack now than meet you after a chimney fire.
I've been climbing Denver roofs since 2001, and flue tiles are the part nobody thinks about until smoke shows up in the living room. They're hidden, so people assume they're fine. Half the cracked flues I find, the homeowner had no idea anything was wrong. That's why I push the free inspection so hard.
- Adam, Owner, Adam Chimney Sweep
What Are Flue Tiles and Why Do They Matter?
![]() Flue tiles line the inner walls of your chimney and give smoke and exhaust gases a smooth path out of the house. They're usually made from terra cotta (clay) tiles or ceramic materials, and they take the brunt of the heat, corrosion, and combustion byproducts so the rest of the chimney doesn't have to.
Flue tiles line the inner walls of your chimney and give smoke and exhaust gases a smooth path out of the house. They're usually made from terra cotta (clay) tiles or ceramic materials, and they take the brunt of the heat, corrosion, and combustion byproducts so the rest of the chimney doesn't have to.
Think of the flue liner as the inside skin of your chimney. The brick and mortar you see on the outside isn't built to handle direct heat or acidic fumes. The clay tiles are. Strip that liner away, or let it break apart, and the heat and gases start working directly on the masonry and the framing around it. That's where the real trouble starts.

What Healthy Flue Tiles Do for Your Home
- Heat Resistance: Flue tiles can take high temperatures without cracking under normal conditions.
- Moisture Protection: They keep your chimney walls from soaking up moisture and rotting from the inside.
- Safety: By venting carbon monoxide, creosote, and smoke safely outside, they cut down your risk of fire and keep bad air out of your lungs.
Pro Tip: A cracked flue can let carbon monoxide leak right into your house. Get a chimney inspection if you smell smoke indoors or feel odd heat near your chimney walls.
Signs of Defective Flue Tiles
Flue tiles are built to last, but years of high heat, moisture, and creosote buildup wear them down. Eventually they crack or break apart. Here are the warning signs that tell you something's wrong inside the flue:
Top Indicators of Flue Tile Damage
- Cracked or Broken Flue Tiles: Small cracks usually turn up during a visual inspection, especially with a camera.
- Spalling (Flaking) Tiles: Clay tiles chip, flake, or crumble when heat stress gets to them, and you'll sometimes find the bits in your firebox.
- Discolored Chimney Exterior: Staining on the outside of the chimney often means moisture is getting through the flue.
- Strange Odors: A strong creosote or smoky smell inside the home, even when nothing's burning.
- Backdrafts: Smoke drifting back into the room points to poor draft, and cracked tiles are a common cause.
Case Study: On a job in Five Points, Denver, a homeowner noticed smoke escaping from cracks along their living room wall. Our inspection turned up several failed flue tiles that were letting smoke and carbon monoxide leak straight into the house.

What Causes Flue Tile Damage?
 Knowing what wears flue tiles down helps you head off the damage before it gets expensive. Here are the usual culprits we run into around Denver:
- Chimney Fires: The extreme heat of a chimney fire cracks tiles fast, sometimes shattering them.
- Thermal Expansion: Quick temperature swings stress the clay, and that stress shows up as cracks.
- Water Intrusion: Rain and snow seep into tiny cracks, freeze overnight, and pry the tile apart as the ice expands.
- Creosote Buildup: Creosote lights up quickly, and a flue fire from it can wreck the tiles in minutes.
- Aging and Wear: Clay tiles just weaken over the decades, same as anything else.
That water intrusion one is a real Denver problem. Our freeze-thaw cycles are brutal on masonry. A crack that looks harmless in October can split wide open by February after the moisture inside it has frozen and thawed a few dozen times. That's also why a chimney can go from fine to failing in a single hard winter.
How to Repair Defective Flue Tiles
Fixing defective flue tiles is a job for a pro. Here's a step-by-step look at how the repair goes from first look to finished flue.
Step 1: Chimney Inspection
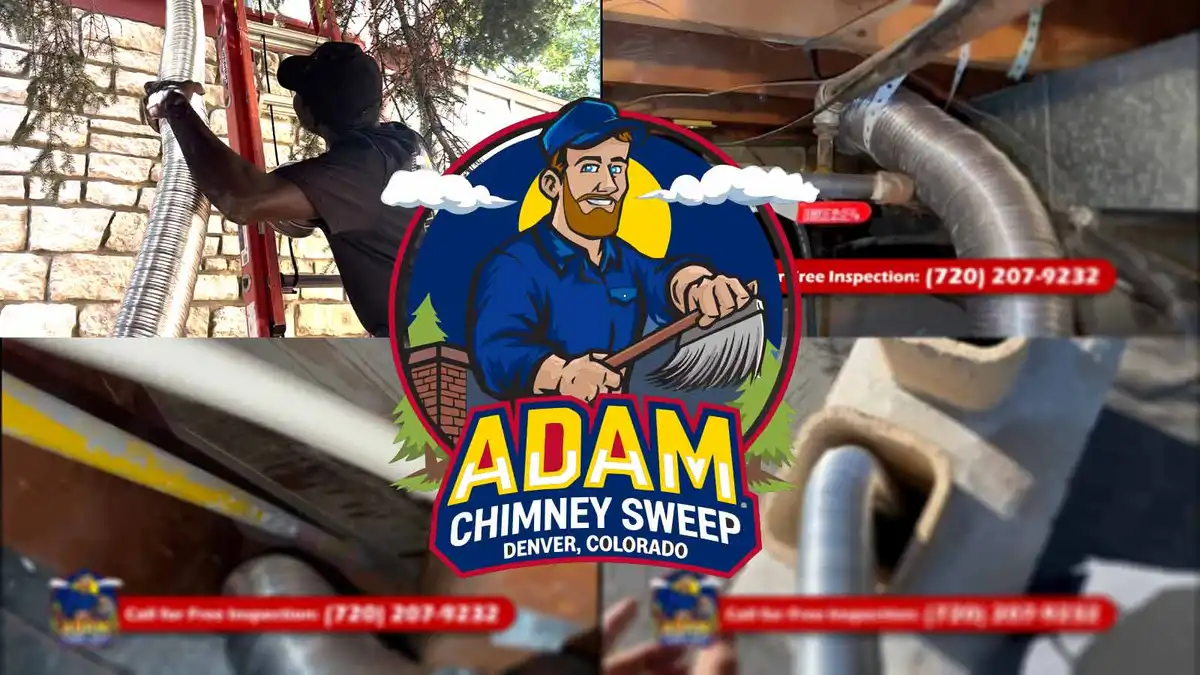
![]() A certified chimney sweep runs a full visual inspection with the right tools, including a video camera, to see exactly what shape the flue tiles are in.
A certified chimney sweep runs a full visual inspection with the right tools, including a video camera, to see exactly what shape the flue tiles are in.
Step 2: Cleaning the Chimney
 We clean the chimney before any repair to clear out creosote and soot, which keeps the rest of the work clean and lets us see the damage clearly.
Step 3: Choosing the Repair Method
![]() How we fix it depends on how bad the damage is. There are a few solid options.
How we fix it depends on how bad the damage is. There are a few solid options.
Option 1: Flue Relining

- Best For: Cracked or damaged flue tiles.
- Method: Install a stainless steel liner inside the chimney to create a safe new passage for exhaust gases.
- Cost: Typically ranges from $2,500 to $5,000, depending on chimney height.
Option 2: Parging (Coating) the Flue
- Best For: Small cracks and surface damage.
- Method: Apply a high-temperature mortar coating over the interior surface of the flue.
- Cost: More affordable, typically costing $1,000 to $2,500.
Option 3: Flue Tile Replacement
- Best For: Extensive damage to a few isolated flue tiles.
- Method: Remove and replace individual clay tiles.
- Cost: Costs vary based on the number of tiles replaced, typically $500 to $2,000.
Tip: For older homes in areas like LoDo or Capitol Hill, relining with a stainless steel liner is usually the most durable, long-term option.
People ask me which repair they need, and honest answer, I can't tell them until I've got a camera down the flue. I've quoted a simple tile swap that turned into a full reline once we saw the whole picture, and I've talked folks out of a reline they didn't need. That's the point of looking first. I'd rather give you the right fix than the expensive one.
- Adam, Owner, Adam Chimney Sweep
How Much Does It Cost to Repair Defective Flue Tiles?
![]() What you'll pay to repair defective flue tiles comes down to how bad the damage is and which method makes sense. Here's a quick table for reference:
What you'll pay to repair defective flue tiles comes down to how bad the damage is and which method makes sense. Here's a quick table for reference:
| Repair Method | Estimated Cost | Time Required |
|---|---|---|
| Flue Relining | $2,500 – $5,000 | 1-2 days |
| Parging | $1,000 – $2,500 | 1 day |
| Flue Tile Replacement | $500 – $2,000 | 1-2 days |
One thing worth saying up front: the cheapest fix isn't always the best value. A $1,000 parging job that fails in three years costs you more than a $3,500 reline that lasts decades. We'll lay out the trade-offs so you can make the call with real numbers in front of you, not a guess.
DIY vs. Professional Flue Tile Repair
![]() Some homeowners want to take a crack at this themselves, and I get the instinct. But flue repair is one place where DIY tends to fall apart, because the work that keeps you safe is the work you can't see or reach.
Some homeowners want to take a crack at this themselves, and I get the instinct. But flue repair is one place where DIY tends to fall apart, because the work that keeps you safe is the work you can't see or reach.
Why Hire a Professional?
- Expertise: Pros use camera tools to find hidden cracks a flashlight will never catch.
- Safety: Getting up on a roof to reach your chimney is genuinely dangerous, especially in Denver weather.
- Warranty: A reputable company backs flue relining and other repairs with a warranty, so you're covered if something goes wrong.
How Often Should You Inspect Flue Tiles?
![]() The National Fire Protection Association (NFPA) says homeowners should book annual inspections to catch flue tile damage early. A yearly look keeps small problems from turning into big, costly ones down the road. You can read the NFPA's guidance on chimney and venting safety over at the NFPA's website if you want the official word.
The National Fire Protection Association (NFPA) says homeowners should book annual inspections to catch flue tile damage early. A yearly look keeps small problems from turning into big, costly ones down the road. You can read the NFPA's guidance on chimney and venting safety over at the NFPA's website if you want the official word.
Did you know? Our inspections come with a complimentary report and photos, so you know exactly what's happening inside your chimney.
Why Choose Adam Chimney for Flue Tile Repairs in Denver, CO?
![]() At Adam Chimney Sweep, we put our name on good customer service and fair pricing for every chimney job we take. From Cherry Creek to Capitol Hill, our technicians have helped Denver homeowners keep their chimneys safe and working right. We're a family business, we've been at this since 2001, and we treat your house the way we'd want someone treating ours.
At Adam Chimney Sweep, we put our name on good customer service and fair pricing for every chimney job we take. From Cherry Creek to Capitol Hill, our technicians have helped Denver homeowners keep their chimneys safe and working right. We're a family business, we've been at this since 2001, and we treat your house the way we'd want someone treating ours.
Our Services Include:
- Free Chimney Inspections
- Flue Relining
- Parging Coating
- Flue Tile Replacement
"Adam Chimney did a fantastic job relining our chimney in Capitol Hill. We can finally enjoy our gas fireplace without worrying about CO leaks. Highly recommend this great company!" – Local Customer

If you want to see the full range of what we handle, take a look at our chimney services or reach out through our contact page and we'll get you on the schedule.
Frequently Asked Questions
Q1: How Do I Know if My Flue Tiles Are Damaged?
![]() Spotting damaged flue tiles early is how you protect your home from fire, smoke backdrafts, and dangerous gases like carbon monoxide. Since the tiles sit inside the chimney, the damage isn't always easy to see. But there are clear signs that mean you need to get someone out there. Here's what to watch for.
Spotting damaged flue tiles early is how you protect your home from fire, smoke backdrafts, and dangerous gases like carbon monoxide. Since the tiles sit inside the chimney, the damage isn't always easy to see. But there are clear signs that mean you need to get someone out there. Here's what to watch for.
Signs of Flue Tile Damage
- Smoke Backdrafts: If smoke from your fireplace drifts back into the room instead of rising up the chimney, broken or blocked flue tiles could be the reason. Cracks mess with the draft and stop smoke from venting the way it should.
- Strong, Unpleasant Odors: A strong creosote-like smell in the house, even when the fireplace is cold, can mean creosote or moisture is collecting in the flue cracks. Water seeps through damaged tiles, mixes with creosote, and leaves a sharp, tar-like odor.
- Visible Cracks or Spalling: During a visual inspection, you might notice bits of flue tile sitting in the firebox. That's called spalling, where pieces of clay or ceramic break off from heat or water. Finding those fragments is a clear sign the tiles are coming apart.
- Discolored Chimney Walls: Dark or stained patches on the outside of the chimney often trace back to water getting in through cracks in the flue, soaking the masonry, and leaving marks.
- Carbon Monoxide Detectors Triggering: Carbon monoxide leaks are silent and deadly. If your detector goes off with no obvious cause, cracked flue tiles letting gas escape could be why. Take it seriously.
Pro Tip: If you're not sure your flue tiles are holding up, call a professional chimney sweep for a free chimney inspection. Our team at Adam Chimney Sweep in Denver, CO uses video camera inspections to find hidden cracks.
The carbon monoxide one keeps me up at night, honestly. CO has no smell and no color, so a cracked flue can be venting it into a bedroom and nobody knows. If your detector goes off and you can't find a reason, don't reset it and move on. Get out of the house and call us. I'll take a false alarm over the alternative every single time.
- Adam, Owner, Adam Chimney Sweep
Q2: Can I Still Use My Fireplace if I Have Cracked Flue Tiles?
No. Running a fireplace with damaged flue tiles is flat-out dangerous. Even tiny cracks can lead to house fires, carbon monoxide leaks, and smoke you shouldn't be breathing. Here's why you need to stop using it until it's fixed.
Why You Shouldn't Use a Fireplace with Defective Flue Tiles
- Risk of Carbon Monoxide Poisoning: Flue tiles are there to carry combustion gases, carbon monoxide included, safely outside. A crack lets those gases seep into your home. Since carbon monoxide is odorless and colorless, you might not catch it until you feel dizzy, get a headache, or turn nauseous.
- Fire Hazard: One of the worst risks of a cracked flue is a chimney fire. Gaps let creosote build up faster, and creosote is highly flammable. Once it lights, a chimney fire can get out of control in a hurry.
- Structural Damage: Water seeps through cracked tiles and reaches the masonry of your chimney. Given time, that brings mold, mildew, and crumbling brick and mortar, which means a bigger repair bill later.
- Heat Transfer to Flammable Materials: The National Fire Protection Association (NFPA) warns that cracked flue tiles expose the surrounding chimney walls to extreme heat. Without that intact clay barrier, the heat can reach wood beams or insulation and start a fire.
Local Story: On a job in Cherry Creek, Denver, a homeowner called us after hearing odd "popping" sounds while using their fireplace. We took a look and found cracks in several flue tiles that were letting heat reach the nearby wall. We recommended a full flue relining with stainless steel, which made the home safe again and got the fireplace working the way it should.
Pro Tip: If you suspect cracked flue tiles, stop using the fireplace right away. Call Adam Chimney Sweep at (720) 207-9232 for an inspection.
Q3: How Long Does a Flue Relining Take?
Flue relining is often the best fix when tiles are cracked or badly damaged. The job means installing a new stainless steel liner or coating the inside of the chimney with a specialized sealant. So how long does it take?
Time Required for Flue Relining
A flue relining job takes 1 to 2 days. The exact timeline depends on a few things:
- Chimney Height and Accessibility: Chimneys on multi-story homes take longer since the techs climb higher and use more material to cover the full length.
- Degree of Damage: If the clay tiles or chimney walls are badly damaged, we may need extra prep, like pulling old tiles or shoring up the structure.
- Type of Relining Material: A stainless steel liner goes in faster than parging, since refractory cement needs time to set and cure.
- Weather Conditions: Snow or rain in Denver, CO can push the job back. Wet weather makes the roof unsafe and slows the curing on parging material.

Relining Methods and Time Estimates
| Relining Method | Time to Complete | Description |
|---|---|---|
| Stainless Steel Liner | 1 Day | A pre-formed steel liner is inserted into the flue. |
| Parging Coating | 2 Days | The interior of the flue is coated with a high-temperature refractory sealant. |
| Tile Replacement | 1-2 Days | Damaged flue tiles are individually replaced. |
Pro Tip: Relining is a permanent fix for flue tile damage, especially in older homes around Capitol Hill and Five Points. Stainless steel liners are tough, resist corrosion, and last for decades.
Customer Testimonial: "The team at Adam Chimney Sweep relined our chimney in just one day. It was a hassle-free process, and now we have peace of mind knowing our fireplace is safe for our family." — Resident of Highlands, Denver
Q4: How Often Should I Have My Flue Inspected?
Routine chimney inspections are how you catch defective flue tiles before they turn into chimney fires or carbon monoxide leaks. So how often should you schedule one?
NFPA Inspection Guidelines
The National Fire Protection Association (NFPA) recommends having your chimney, flue, and fireplace inspected at least once a year. That annual check lets you catch small problems, like hairline cracks in the flue, before they grow into costly repairs.
Why Annual Inspections Are Worth It
- Catch Flue Damage Early: A simple crack spreads fast, especially with the freeze-thaw swings we get in Denver, CO.
- Prevent Creosote Buildup: An inspection keeps your chimney clear of creosote, which is a real fire hazard once it piles up.
- Keep the Draft Right: A blocked or damaged flue can send smoke and toxic gases back into your home. A yearly look keeps the airflow where it should be.
- Sleep Easier: Knowing your flue, fireplace, and chimney are in good shape feels a lot better heading into winter, when you're using the fireplace most.
Types of Inspections
| Inspection Type | What It Covers | When to Schedule |
|---|---|---|
| Level 1 Inspection | Basic visual inspection of accessible areas | Annually, for chimneys with no recent issues. |
| Level 2 Inspection | Includes camera inspection of the flue interior | After severe weather, fires, or when selling a home. |
| Level 3 Inspection | Involves removing parts of the chimney for full access | Required when significant issues are suspected. |
Pro Tip: Book a Level 2 inspection if you've just bought a home in Denver, CO. You could be inheriting hidden problems like cracked flue tiles, and a camera inspection is the only way to know for sure.
Call to Action: If it's been more than a year since your last inspection, book a free chimney inspection with Adam Chimney Sweep at (720) 207-9232. Our certified technicians use video technology to find even the smallest cracks. You can also schedule online through our chimney inspection page.
Q5: What's the Difference Between Repairing and Relining a Flue?
This one comes up a lot, so it's worth clearing up. A repair usually means fixing what's already there, like swapping out a few cracked tiles or parging over surface damage. Relining means putting a whole new liner, typically stainless steel, down the inside of the chimney. Relining is the bigger job, but it's also the one that lasts longest, and for badly damaged flues it's often the only fix that brings the chimney back up to code. If your flue is mostly sound with a couple of bad spots, a targeted repair may be all you need. If the damage runs the full length, relining is the smart money. For more on the repair side of things, see our chimney repair in Denver page.
Q6: Does Homeowners Insurance Cover Flue Tile Repair?
It depends on the cause. If your flue cracked because of a sudden event, like a chimney fire or storm damage, there's a decent chance your policy helps cover the repair. If the tiles failed from age and normal wear, most policies treat that as routine maintenance and won't pay out. This is exactly why our inspection reports come with dated photos. If you do file a claim, having clear documentation of the damage makes the whole process smoother. Check with your insurer, and we're happy to give you a detailed report to send along.
Schedule Your Free Chimney Inspection Today!
If you're in Denver, CO and you think something's wrong with your flue tiles, call Adam Chimney Sweep at (720) 207-9232. Our experienced technicians will check that your fireplace, wood-burning stove, or gas fireplace is safe, efficient, and up to code. Don't wait for smoke in the living room or a detector going off in the middle of the night. A quick inspection now can save you a fortune and keep your family safe. Stay warm, Denver.