You can catch most chimney problems yourself, for free
You don't need a service call to keep an eye on your chimney. Between professional inspections, a homeowner with a flashlight can catch most of the warning signs that turn into expensive repairs, and it costs nothing but ten minutes. I've quoted plenty of jobs the homeowner could've spotted a year earlier, while the fix was still small. This is the free DIY chimney checkup I wish every customer ran a few times a year.
To be clear up front: this is a checkup, not a replacement for a professional inspection. Think of it like checking your own oil between dealer visits. It tells you when something's wrong and when to call. It doesn't replace the trained eye, the camera, and the ladder. With that said, here's what you can safely do yourself.
Half the repairs I quote could've been caught a year earlier by the homeowner, for free, with a flashlight. You don't need my truck to notice a problem, you just need to know what you're looking at.
- Adam, Owner, Adam Chimney Sweep
Before you start: three safety rules
- Cold only. The fireplace must be completely out and cool, with no warm coals, before you put your head anywhere near it.
- Stay on the ground. Everything in this checkup is done from inside the house or with your feet on the lawn. Do not get on the roof.
- Gear up. A bright flashlight, a small mirror, safety glasses, gloves, and a dust mask are all you need. Lay down a drop cloth so you aren't scrubbing soot out of the carpet afterward.
The 8-point DIY chimney checkup
Work through these in order. None of them need tools you don't already have around the house:
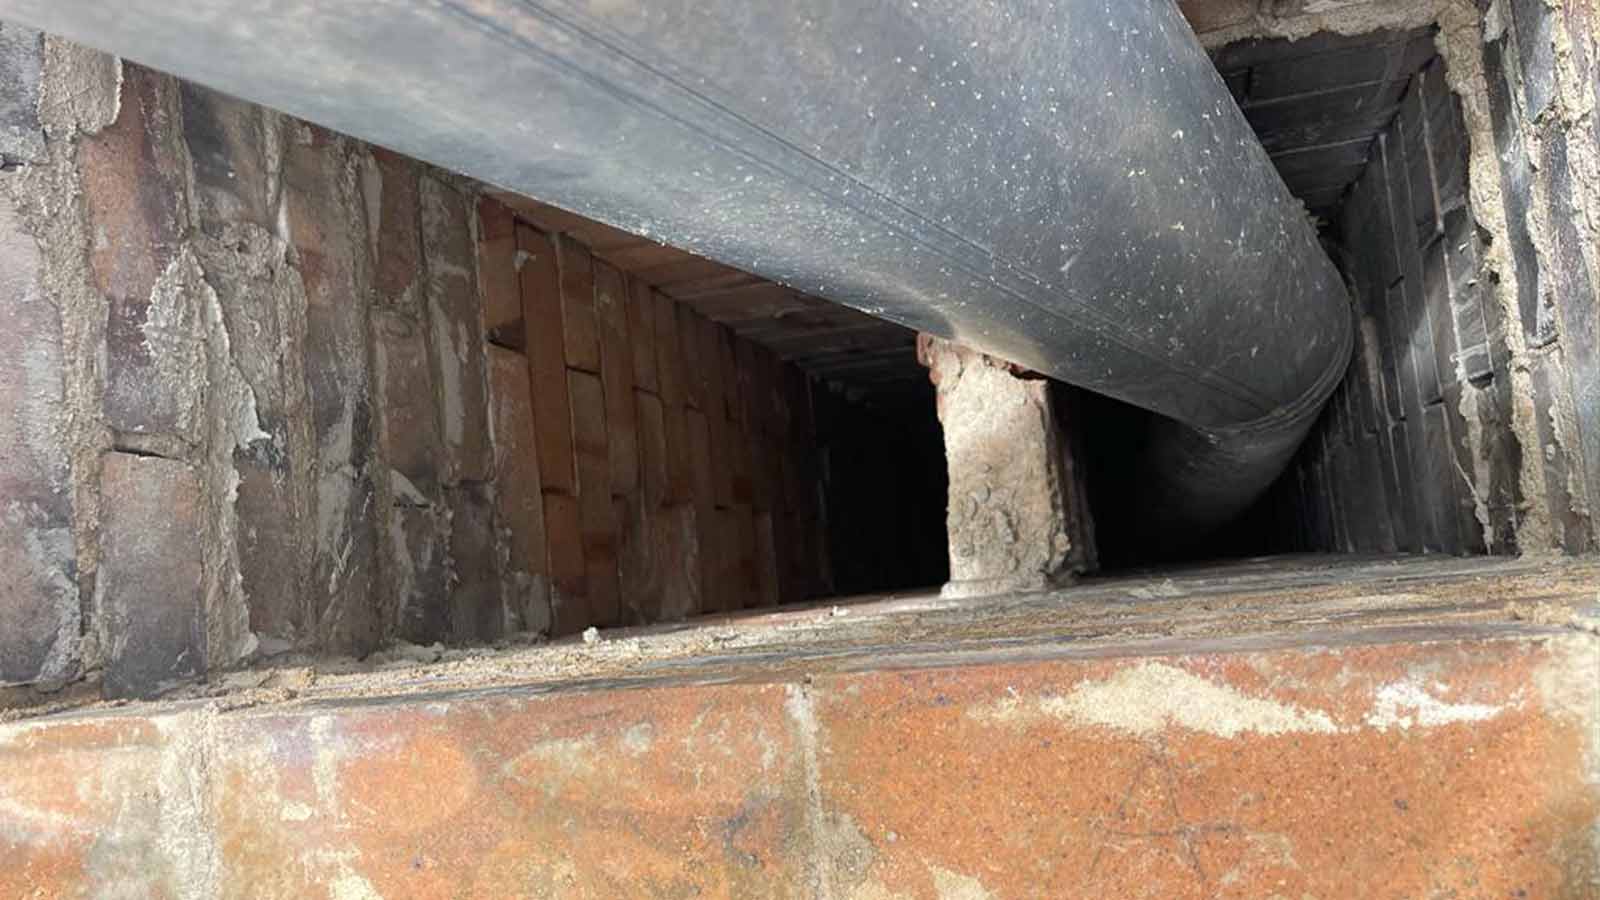
- Look up the flue. Open the damper, get your head near the firebox opening, and shine a flashlight straight up. Use the mirror to see past the smoke chamber. You're looking for daylight at the top and for buildup on the walls.
- Check the damper. Open and close it a few times. It should move freely and seal fully. A damper that sticks, won't close, or is rusted through is letting your heated air escape year round.
- Inspect the firebox. Look closely at the firebrick and the mortar joints. Hairline cracks are normal, but gaps you can fit a coin into, crumbling mortar, or missing chunks of brick need attention.
- Scan the cap and crown from the ground. Step into the yard with binoculars. Is the chimney cap still there and upright? Is the concrete crown on top cracked or crumbling? A missing cap is an open invitation to rain and animals.
- Hunt for water stains. Look at the ceiling and walls around the chimney, in the attic if you can reach it safely, and on the masonry itself. Brown stains, white chalky residue, or damp spots all point to a leak.
- Use your nose. A strong musty, barbecue, or sewer-like smell, especially in summer, signals moisture, heavy creosote, or an animal in the flue.
- Test the draft. With the damper open and a window cracked, light a stick of incense or a match in the firebox. The smoke should pull straight up the chimney. If it drifts into the room, your chimney isn't drafting properly.
- Check around the hearth. Look for debris, nesting material, or fallen bits of masonry on the smoke shelf and hearth. On a gas unit, glance at the logs and the gasket for obvious damage, but leave the gas components themselves to a pro.

A quick look every month between sweeps is the cheapest insurance there is. If you see shiny black buildup or a crack you can fit a coin into, stop using it and call someone. That glaze is a chimney fire waiting for a match.
- Adam, Owner, Adam Chimney Sweep
How to read what you found
Spotting something is only useful if you know what it means. Here are the findings that matter most:
- Shiny, tar-like black buildup is glazed creosote, and it's the most dangerous thing on this list. It's highly flammable and it doesn't brush off. Stop using the fireplace and read about preventing creosote buildup while you arrange a sweep.
- Buildup thicker than about an eighth of an inch means it's time for a cleaning, full stop.
- Cracks in the firebox or crown let heat and water reach places they shouldn't. Small ones are a watch item; large ones are a call-now item.
- Water stains almost always trace back to a failed cap, crown, or flashing, and water does more slow damage to a chimney than fire does.
The Chimney Safety Institute of America keeps a plain-English library of homeowner safety resources if you want to dig deeper into any of these.
What you should never DIY
Knowing where the line is keeps you safe and saves you money. Leave these to a professional every time:
- Anything on the roof. Caps, crowns, and flashing are real repairs done at height. No homeowner photo is worth a fall.
- The actual sweeping. A shop vac and a hardware-store brush will move soot around your living room and miss the glaze that matters. Removing creosote safely takes the right brushes, containment, and know-how.
- A Level 2 internal inspection. Seeing inside the flue properly takes a specialized camera. If you're buying or selling a home, or you've had a chimney fire, you need a real one. Here's how the chimney inspection levels break down.
Check everything you can reach from the ground and the firebox. The day you feel like climbing the roof to do it yourself is the day you call me instead. No view is worth a fall.
- Adam, Owner, Adam Chimney Sweep
When your checkup says call a pro
Your free checkup did its job if it tells you when to pick up the phone. Call for a professional look if you see glazed creosote, cracks you can fit a coin into, a missing or damaged cap, water stains, or smoke that drifts into the room. Those are also on our list of the top signs you need chimney service, and a leak in particular is worth reading up on in our guide to why chimneys leak. When in doubt, a professional chimney inspection is the cheap, fast way to know for sure.
Build the checkup into your season
The homeowners who never get surprised by a big repair are the ones who make this a habit instead of a one-time thing. In Colorado our freeze-thaw cycles are hard on masonry: water slips into a hairline crack, freezes overnight, and pries it wider by spring, so a rhythm of quick looks pays off more here than almost anywhere. Here's the schedule I give my own customers:
- Early fall, before the first fire. Run the full 8-point checkup. This is the big one, your chance to catch anything that shifted over the summer before you lean on the fireplace all winter.
- Once a month during burning season. A two-minute version: glance up the flue, work the damper, look for new stains or smells. You're watching for change more than anything.
- Spring, after the last fire. Check the season's wear, the soot level, any new cracks, and a quick scan of the cap and crown from the yard. This tells you whether to book a sweep before you forget about the chimney all summer.
None of this takes long, and a phone reminder or a note tucked in the firebox is enough to keep it on track. A few minutes three times a year is the difference between a small fix you saw coming and a big one you didn't.
Frequently asked questions
How often should I do a DIY chimney checkup?
A quick visual checkup once a month during burning season, plus a fuller one in early fall before you light the first fire, is plenty. It doesn't replace a professional inspection, which the industry recommends once a year, but it helps you catch changes between those visits.
Can I just clean the chimney myself with a brush?
You can buy a brush, but doing it well is harder than it looks, and it's messy and easy to do badly. A shop vac spreads fine soot through your home and a hardware-store brush won't remove glazed creosote. The checkup is great DIY; the actual sweep is worth leaving to a pro.
What does dangerous creosote look like?
The dangerous kind is glazed creosote: a shiny, hard, tar-like black coating on the flue walls. It's highly flammable and it can't be brushed off. If you see it, stop using the fireplace and have it dealt with before your next fire.
Is a DIY checkup enough, or do I still need a professional inspection?
You still need a professional inspection. The checkup is for catching changes and red flags between visits, but it can't see the full length of the flue or judge hidden masonry the way a camera and a trained eye can. The industry standard is one professional inspection a year, and your DIY checks fill the gap in between.
Run this checkup a few times a season and you'll catch trouble while it's still cheap. While the fire's going, you can also squeeze more warmth out of it with our tips on getting more heat from your fireplace for free. Found something you don't like? Get a free quote and we'll take it from there.