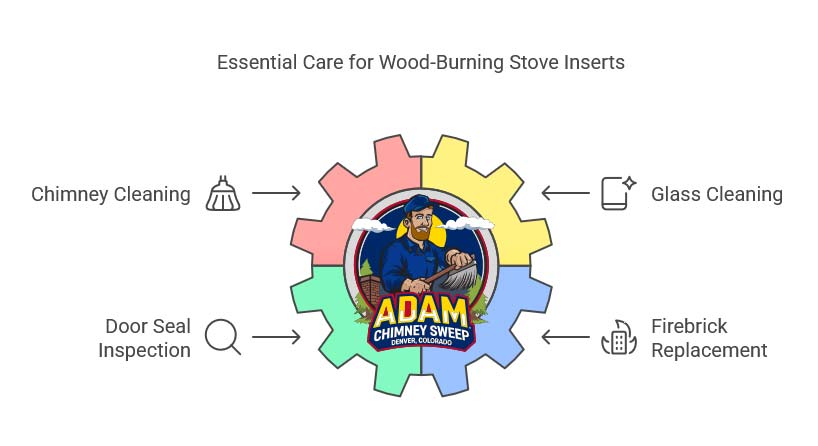
A wood stove is one of the few appliances in a house that a careful owner can keep in good shape with a screwdriver, a flashlight, and a dollar bill. The parts that wear are the door gasket, the glass, the baffle, the firebrick, the air control, and on some stoves a catalytic combustor. Every one can be checked in an afternoon.
It matters because a wood stove is a sealed box that is starved of air on purpose. When the seal fails, the stove pulls in air it was never meant to have, burns hotter than the steel was built for, and starts eating its own firebrick. When the baffle sags or the catalyst plugs, the heat you paid for in cordwood goes up the flue. A leaking gasket and a tired baffle are the two most common reasons we hear "my stove used to heat the whole house and now it barely warms the living room."
Here is how to inspect each part, what you can fix yourself, and where the technician line sits.
Why a Sealed Stove Depends on Its Gaskets
A modern stove controls the fire by controlling air. The only air that should reach the wood comes through the primary inlet, the airwash over the glass, and the secondary tubes or catalyst. When the door gasket leaks, uncontrolled air enters low in the firebox, right at the coal bed, where extra oxygen does the most damage. The fire runs away and you cannot slow it no matter how far you close the air slide.
At Front Range altitude this is worse than the manuals assume. Thinner air at 5,000 to 8,000 feet means the stove needs more air volume per log, cold drafts run harder, and downslope winds push and pull on a marginal seal. A leaky door on a windy January night is a recipe for an overfire, which warps steel, cracks welds, and shatters firebrick. When a homeowner who "always burns dry wood" has a chimney fire, a leaking gasket is a common answer; our guide to chimney fire causes and warning signs covers the rest.
The Dollar Bill Test for the Door Gasket
The dollar bill test is the oldest trick in the trade and it still works. With the stove cold, lay a paper bill across the gasket so half hangs outside, then close and latch the door and pull. Light drag means the seal is fine at that spot. No resistance means the gasket has gone flat or hard right there. Repeat every four to six inches around the door, especially at the hinge side and the corners, where gaskets compress unevenly.
Do the same at the ash pan door if you have one, because an ash pan leak feeds the coal bed from below. Test cold, since hot steel expands and can hide a gap. Colorado's dry air also shrinks rope over a summer, so a seal that passed in April can fail by October. Retest every fall.
Other signs of a failed gasket are a soot streak on the glass near the door edge, a fire that keeps roaring with the air fully closed, or white, crunchy, frayed rope. Most gaskets on a daily burner last two to four heating seasons.
How to Replace a Rope Door Gasket
Gasket replacement is a two hour job the first time and forty minutes after that. The critical step is buying the correct size and density. Too thin leaks; too thick keeps the door from latching.
- Find the specification in the owner's manual. Most stoves call for a diameter between three eighths and one inch and a density such as low, medium, or high. If the manual is gone, measure the channel and take a sample of the old rope to a stove shop. Our parts shop stocks common gasket kits and cement.
- Remove the door and lay it flat. Most doors lift off their hinge pins. Set it gasket side up on a towel.
- Pull the old gasket and clean the channel. Strip the rope and scrape the old cement down to bare metal, or the new cement will not bond.
- Lay a bead of gasket cement. Run a continuous bead down the center of the channel without overfilling. The cement only holds the rope while it cures; the latch does the real work.
- Seat the rope starting at the bottom hinge corner. Press it in without stretching it, since stretched rope shrinks back and leaves a gap. Cut the end so it butts firmly against the start.
- Hang the door and latch it closed. Closing on wet cement compresses the gasket to the exact shape of the stove face.
- Let the cement cure. Follow the tube, usually a few hours, then run a small break in fire. Expect a little odor the first burn.
- Repeat the dollar bill test. Adjust the latch if the door is now too tight or one corner still slips.
If a new gasket still will not seal, the latch cam or strike plate is worn and needs replacement.
The Glass Gasket and Cracked Glass
Stove glass is a transparent ceramic that sits in a flat woven or tape gasket, and when that gasket fails, incoming air scrubs a clean stripe through the soot along the edge, which is your cue to replace the flat gasket. Replace the glass itself for any crack or edge chip, or for a white haze that will not come off with the free ash and newspaper method, and snug the retaining clips gently and evenly, since overtightened clips are the usual reason a new pane cracks on the first fire. Our fireplace glass doors guide covers ceramic versus tempered glass and the full procedure for swapping glass, gaskets, and hardware.
The Baffle: The Part Nobody Looks At
The baffle is the plate or board across the top of the firebox, just below the flue outlet. It holds heat and smoke in the firebox longer so the gases finish burning before they leave. On non catalytic stoves it is usually ceramic board or vermiculite; on older stoves it is a steel plate. It takes the most abuse and gets the least attention.
When the baffle sags, cracks, or goes missing, the fire has a straight shot to the flue. The stove burns through wood fast, the flue runs hot, the room stays cool, and creosote builds faster because smoke leaves before it is fully burned. If the stovepipe is hot and the room is cold, look at the baffle before you blame the wood.
Inspect it cold with a flashlight up through the open door. Look for gaps at the edges, a sag in the middle, broken corners on ceramic board, or a steel plate that has bowed or burned thin. A burned through steel baffle means the stove has been overfired and needs a hard look. We check baffles on every chimney and stove inspection because so many stoves that came with a house have a worn one.
Firebrick and Refractory Panels: Cracks That Matter and Cracks That Do Not
Firebrick lines the firebox to protect the steel from direct flame and to hold heat. Prefab fireplaces and some stoves use molded refractory panels instead. Both crack eventually; the trick is knowing which cracks need action.
Cracks that are fine
- Hairline cracks you can see but cannot fit a fingernail into.
- Cracks where the brick stays firmly in place and does not rock.
- Fine surface crazing on refractory panels after years of use.
Cracks that need a fix
- Any gap wide enough to see bare steel behind it.
- A brick broken into pieces that shift when pressed.
- Missing chunks, crumbling corners, or a brick that has fallen out of position.
- A refractory panel that has bowed away from the wall or cracked all the way through.
Firebrick that exposes steel lets flame hit the stove body directly, and that is how a firebox wall warps. Individual bricks come in standard sizes, so swapping one or two takes ten minutes. If the steel behind a failed refractory panel is damaged, that becomes a firebox repair rather than a parts swap.
The Catalytic Combustor
A catalytic stove has a honeycomb combustor coated with a catalyst that lets smoke burn at a much lower temperature. Our EPA certified wood stove guide covers catalytic versus non catalytic, so we will stick to inspection here.
Pull the combustor at least once a season and hold it up to a light. You should see daylight through every cell. Plugged cells mean fly ash or creosote; a soft brush or gentle compressed air clears most of it, never a wire brush, because the coating is fragile. Look for crumbling edges or missing corners, and check the gasket that wraps it, because an edge leak lets smoke bypass the catalyst.
A combustor that is intact but no longer lights off, meaning the catalyst thermometer no longer jumps after the bypass closes, has lost its coating. Typical replacement intervals run several heating seasons, shorter for heavy daily burners. Wet wood, trash, and treated lumber shorten that life dramatically, one more reason to follow our guide to the best firewood for Colorado.
The Air Control: A Stuck Slide Changes the Whole Burn
The air control is a slide or rotary damper that meters primary air into the firebox. Its slot fills with ash and gets stiff over a season, and a stuck control is often misdiagnosed as a gasket or draft problem. Stuck open, the stove overfires. Stuck closed, it smolders, smokes back when you open the door, and blackens the glass.
Once a month in season, with the stove cold, work the control through its full range and feel for binding. Vacuum the slot, the inlet behind it, the catalyst bypass, and the fixed secondary air inlet, which collects dust and pet hair over the summer. You cannot safely run a stove you cannot turn down, so free any stiff control before the next fire. Never use oil or grease where it will burn.
Seasonal Wood Stove Maintenance Schedule
This is the routine we recommend. It assumes a stove that burns most days from October through April; a weekend stove can do the monthly items once or twice a season.
Table 1. Seasonal maintenance checklist for a wood stove, organized by timing, part, and the check or task involved.
| Timing | Part or area | Check or task |
|---|---|---|
| Before the season | Door and ash pan gaskets | Dollar bill test all around; replace flat, hard, or frayed rope |
| Before the season | Glass and glass gasket | Look for cracks, chips, edge haze, and clean stripes that indicate a leak |
| Before the season | Baffle and burn tubes | Flashlight check for sag, cracks, gaps, or missing board |
| Before the season | Firebrick and refractory | Replace any brick with a gap to steel, loose pieces, or missing chunks |
| Before the season | Catalytic combustor | Remove, hold to light, brush gently, check gasket and fit |
| Before the season | Stovepipe and chimney | Brush the connector yourself; book a professional sweep and inspection |
| Monthly in season | Air control and bypass | Work through full range cold; vacuum the slot and inlets |
| After the season | Firebox | Empty all ash; ash draws moisture and rusts steel over a humid monsoon summer |
The "before the season" block is the important one. Every item on it is cheaper and safer in September than in November, when the first cold snap fills every stove shop. Our spring chimney maintenance guide covers the outdoor side of the routine.
Cleaning the Stovepipe Connector
Between the stove and the chimney sits the connector, usually black single wall or double wall stovepipe. It is the coolest part of the exhaust path, so it collects creosote fastest, and it is the part a homeowner can clean, while the chimney itself is a job for a professional chimney sweep with the right brushes and a camera.
- Wait until the stove is completely cold and lay a drop cloth over the hearth and floor.
- Remove the screws at each joint and lift the sections off the stove collar. Note the orientation: crimped ends point down so creosote drips back into the firebox, not out of the seams.
- Take the sections outside and brush each into a bucket. Black flaky deposit is normal. A hard, shiny glaze means wet wood or a stove run too cool; read our guide to preventing creosote buildup before the next fire.
- Inspect every section for rust through, split seams, or holes. Replace damaged sections rather than patching them.
- Check the thimble where the pipe enters the chimney and the clearance to any combustible. Single wall pipe needs far more clearance than double wall; the manufacturer's listing and NFPA 211 set the numbers.
- Reassemble with three new screws per joint, fully seated.
More than a cup or two of creosote per cleaning means something upstream is wrong: wet wood, a stove run too low, a failed baffle, or a chimney too cold for the stove. Our liner insulation guide covers the last one.
Where Owner Maintenance Stops and a Technician Starts
Every item above is fair game for a homeowner who reads the manual. The line is structural damage and anything involving gas.
Table 2. Wood stove problems sorted by who should handle them, the usual fix, and the risk of ignoring them.
| Problem | Who handles it | Typical fix | Risk of ignoring it |
|---|---|---|---|
| Flat or frayed door gasket | Homeowner | Rope gasket kit and cement | Overfire, burned firebrick, warped door |
| Cracked or hazed glass | Homeowner | Ceramic glass and flat gasket | Glass failure during a fire |
| Stuck air control | Homeowner | Clean slot and inlet, free the linkage | Uncontrollable fire or smoldering |
| Dirty chimney flue | Sweep | Professional sweep with camera | Chimney fire |
| Warped stove top, door, or firebox wall | Technician | Evaluate for repair or replacement | Cracks, leaks, structural failure |
| Cracked welds or burned through steel | Technician | Stove is usually retired | Carbon monoxide, fire |
| Any gas log or gas insert conversion | Licensed technician | Permitted installation | Gas leak, carbon monoxide, code violation |
Overfire damage is the big one. A bowed stove top, a door that no longer sits flat, a bellied firebox wall, or a crack in any weld means stop burning and call. A stove can look fine from the couch and still have daylight showing through a rear weld. After an overfire, a Level 2 inspection with a camera down the flue is the right call, because the liner took the same heat.
Anything that touches gas is a licensed technician job, full stop. Converting to a gas insert involves the gas line, the venting, and a permit. Owners of an insert in a 1900s Denver masonry fireplace should also read our guide to wood burning stove inserts in Colorado, because an insert adds surround seals to the list.
Frequently Asked Questions
How often should a wood stove door gasket be replaced?
There is no fixed interval. Run the dollar bill test before every season and whenever the fire seems hard to control. A daily burner typically needs a new gasket every two to four seasons; a weekend stove can go much longer.
Can I use any rope gasket, or does it have to match?
It has to match. Diameter and density come from the owner's manual or from measuring the channel. Too thin leaks, too thick prevents the door from latching and can bend the latch.
Is a hairline crack in stove glass safe to keep burning?
No. Every heating cycle grows the crack until a piece drops out during a fire. Replace it with the ceramic glass rated for your stove, never tempered or window glass.
Why does my stove burn through wood fast and not heat the room?
The two most common causes are a leaking door gasket letting in uncontrolled air and a sagging or missing baffle sending heat straight up the flue. Check both before changing how you load the stove.
What does a plugged catalytic combustor look like?
Hold it up to a light. You should see through every cell. Plugged cells look dark and packed with ash. Crumbling edges, missing corners, or no temperature jump after the bypass closes all point to replacement.
Can I sweep my own chimney if I clean the stovepipe myself?
You can clean the connector pipe yourself. The chimney above it needs a professional sweep with the right brushes and a camera to remove creosote fully and catch liner damage you cannot see from below.
Get the Stove and the Chimney Checked Before the First Fire
Gaskets, glass, baffles, and firebrick are yours to handle, and we are glad to talk you through them or sell you the parts. The chimney, the inspection after an overfire, and anything involving gas are ours. Book a sweep and inspection in September or early October, before the first cold snap fills the schedule. Current service pricing is on our chimney and fireplace pricing page, and our crew is reachable at (720) 207-9232 or through the contact page.