Stovepipe and chimney pipe are not the same product, and the difference is not cosmetic. Stovepipe, which the codes call a chimney connector, is the black single wall or double wall pipe that runs from the collar on your wood stove to the point where the chimney begins. Class A chimney pipe is the listed, insulated, usually silver system that carries the exhaust through the ceiling, the attic and the roof, or up the outside wall of the house. Stovepipe stays in the room with the stove. Class A is the chimney.
The rule that matters most: a chimney connector must never pass through a wall, a ceiling, an attic, a closet or a floor. Once the exhaust has to leave the room, it needs to be inside a listed chimney, either a Class A pipe system or a sound, correctly sized masonry flue. Every fall we find black stovepipe disappearing into drywall in Front Range basements and cabins, and the homeowner almost never knows it is a problem.
What a Chimney Connector (Stovepipe) Actually Is
A chimney connector is the short run of pipe between the flue outlet on the appliance and the chimney itself. On a freestanding wood stove it is the black pipe you can see. The galvanized vent on a furnace or water heater is the same idea, covered in our furnace and water heater venting guide. Stovepipe comes in two forms.
Single wall stovepipe
One layer of steel, typically 24 gauge or heavier for the common 6 and 8 inch sizes, painted black. It is inexpensive and radiates a lot of heat into the room, which is also its limitation: the outer surface runs hot enough to slowly cook nearby framing, so it needs a wide clearance to anything combustible, generally 18 inches per NFPA 211 unless a listed reduction method is used.
Double wall stovepipe
Two layers of steel with an air gap between them, often a stainless inner liner under a black outer jacket. The outer surface runs much cooler, so the manufacturer can list it for a smaller clearance, commonly around 6 inches to a wall and 8 inches to a ceiling depending on the brand. It also keeps flue gases warmer, which helps draft and slows creosote buildup.
What Class A Chimney Pipe Is
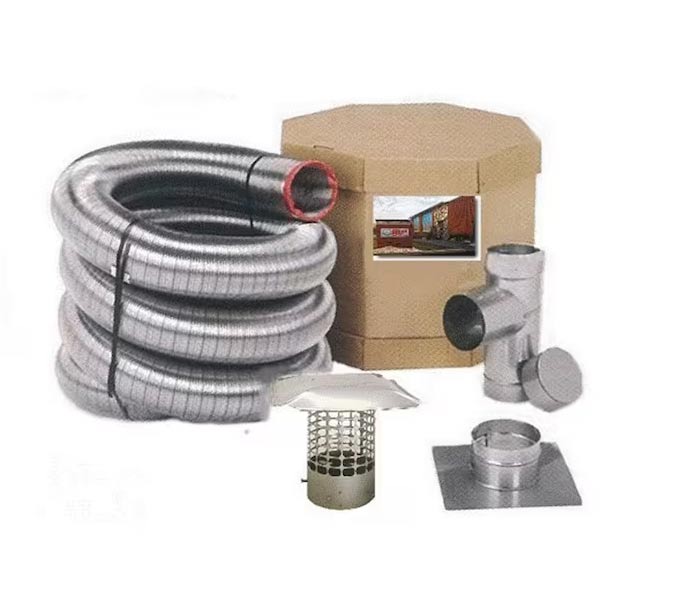
Class A chimney pipe, sometimes called all fuel or HT pipe, is a factory built chimney system listed to UL 103. The HT version, required for wood stoves in the United States, is tested at 2100 degrees Fahrenheit to simulate a chimney fire. Most Class A pipe is a stainless steel inner liner wrapped in an inch or more of insulation under a stainless or galvalume outer jacket.
Because the insulation keeps the jacket cool, listed Class A pipe carries a clearance to combustibles of only about 2 inches. That small number is what allows it to pass through framed ceilings, attics, roofs and walls when the manufacturer's support boxes, firestops and shields are used. It is the only kind of prefabricated pipe allowed to do so with a wood stove.
Class A comes with a family of matched parts: support boxes, wall thimbles, insulation shields, firestops, flashings, storm collars, braces and caps, each designed for that brand's pipe and no other. If you are still choosing an appliance, our wood stove and insert guide for Colorado explains how the stove choice drives the venting choice.
Why Stovepipe Must Never Pass Through a Wall, Ceiling or Attic
Wood framing does not need an open flame to catch fire. Wood held at a few hundred degrees for months or years goes through a slow change called pyrolysis. Its ignition temperature drops, and eventually a hot day and a hard burn push it over the edge. Put a pipe that can pass 500 degrees inside a framed ceiling with insulation packed around it and you have built a slow fuse.
A wall or ceiling penetration does three things stovepipe cannot handle:
- It traps heat. In the open room, air carries heat away from the pipe. Inside a framing cavity it builds against wood and insulation with nowhere to go.
- It hides the pipe. Stovepipe corrodes from the inside out as creosote and moisture attack it. In the attic, nobody sees the pinhole until smoke is pouring out of it.
- It removes the safety margin during a chimney fire. Class A HT pipe is tested at 2100 degrees so a creosote fire stays inside the flue. Thin single wall pipe glows red and warps at those temperatures.
NFPA 211, the standard the model mechanical and residential codes reference for solid fuel venting, is direct about this. Connectors may not pass through floors, ceilings or concealed spaces, and where a connector passes through a combustible wall to reach a masonry chimney, it must do so through a listed or code built wall pass through, not a hole cut in the drywall.
Clearance to Combustibles: Single Wall Versus Double Wall Connector
Clearance is the air gap between the outside of the pipe and the nearest combustible surface, measured everywhere along the run. Combustible means wood studs, drywall on framing, paneling, trim, curtains, a mantel, the firewood stack and the ceiling. Drywall by itself is not a clearance reducer because the studs behind it get hot right through the gypsum.
Table 1. Typical clearance to combustibles for chimney connector types, before and after listed reduction methods.
| Connector type | Unprotected clearance | Common reduction methods | Practical result |
|---|---|---|---|
| Single wall stovepipe | 18 inches per NFPA 211 (general rule) | Ventilated sheet metal shield spaced 1 inch off the wall, or a listed pipe shield clamped to the pipe | Often reduced by up to two thirds with a properly built ventilated shield, typically to 6 inches |
| Double wall stovepipe | Per listing, commonly 6 inches to walls and 8 inches to ceilings | Manufacturer specific shields only; generic reductions generally do not apply | Usually installed at listed clearance with no reduction needed |
| Class A chimney pipe | About 2 inches per listing | None permitted; 2 inches is already the tested minimum | Maintain the full air gap through every framed penetration |
How clearance reduction really works
NFPA 211 allows the 18 inch single wall clearance to be reduced when a protector sits between the pipe and the combustible surface. The protector that earns the largest reduction is a sheet metal or cement board panel mounted on noncombustible spacers with an open 1 inch air channel behind it, open at top and bottom so air can flow. The moving air does the work, not the panel. A panel screwed flat to the wall earns far less, and brick veneer glued to drywall earns nothing. A listed pipe heat shield clamped to the stovepipe is the other route; it only protects the side it faces, and the reduction is whatever its listing says.
Single Wall, Double Wall and Class A Side by Side
Table 2. Comparison of single wall connector, double wall connector and Class A chimney pipe.
| Feature | Single wall stovepipe | Double wall stovepipe | Class A chimney pipe |
|---|---|---|---|
| Where it is allowed | Open room only, appliance to chimney | Open room only, appliance to chimney | Through ceilings, attics, roofs and walls; outside the house |
| Clearance to combustibles | 18 inches unless reduced | About 6 to 8 inches per listing | About 2 inches per listing |
| Construction | One layer of painted steel | Steel outer jacket, stainless inner liner, air gap | Stainless liner, packed insulation, stainless or galvalume jacket |
| Main cost drivers | Diameter and gauge; cheapest per foot | Diameter and brand; telescoping sections cost more | Total height, number of penetrations, support boxes, flashing, cap and braces; most expensive per foot |
| Appearance | Matte black, radiates visible heat | Matte black, cooler to the touch | Silver or galvalume, sometimes boxed in a chase above the ceiling |
| Typical lifespan | A few seasons to a decade depending on burn habits and moisture | Often 10 to 20 years with normal use | Decades when kept dry and swept |
| Draft and creosote | Cools gases fastest, most creosote in the pipe | Keeps gases warmer, better draft | Keeps gases warmest, best draft for the height |
How the Pieces Go Together: The Assembly Sequence
Here is the order we follow on a through the ceiling installation. A through the wall installation swaps the ceiling parts for an insulated wall thimble and an exterior tee, but the logic is the same.
- Set the stove on its hearth pad at the manufacturer's clearances and plumb up from the flue collar to mark the ceiling. Handle small offsets with two 45 degree elbows; avoid 90s or keep to one.
- Install the ceiling support box and attic insulation shield. The box carries the weight of the Class A pipe and holds the 2 inch clearance to the joists; the shield keeps loose fill off the pipe. A firestop radiation shield goes at every additional floor.
- Stack the Class A sections upward through the attic and roof, twist locking or banding each joint per the brand. Pipe standing more than a few feet above the roof gets a brace kit so Front Range wind cannot rack it.
- Flash the roof and add the storm collar. Flashing goes under the upslope shingles and over the downslope ones. The storm collar sits above it, sealed to the pipe with high temperature silicone, and is what keeps monsoon rain and snowmelt from running down the pipe into the attic.
- Add the cap, with a spark arrestor screen, which matters in our wildfire prone foothill counties. Check the 3-2-10 rule: at least 3 feet above the roof where it exits and 2 feet above anything within 10 feet.
- Install the adapter at the bottom of the support box. This piece mates Class A to stovepipe and must match the Class A brand.
- Hang the stovepipe with the crimped end down. Each section's crimped male end points toward the stove and slides into the section below it, so creosote and condensation running down the inside stay inside and drain back toward the firebox. Smoke does not care which way the seam faces. Liquid does.
- Fasten every joint with three screws, including the stove collar and the adapter. Double wall connector often uses a locking band instead; follow that pipe's instructions.
The Mistakes We Find in Denver Basements, Cabins and Garages
- Connector run through a closet, pantry or knee wall. Concealed connector is one of the most common fire hazards we write up. The fix is to relocate the stove or use a wall thimble and Class A at the penetration.
- Missing or improvised thimble. Stovepipe pushed through a hole in the drywall and caulked around, or galvanized ductwork used as a sleeve. Galvanized coatings also give off fumes at stove temperatures.
- Upside down joints. Crimped ends pointing up, so creosote drips out of every seam and streaks down the pipe. It looks like a leak because it is one.
- Dryer duct or HVAC flex used as stovepipe. Aluminum flex is rated for a dryer at a couple hundred degrees and has no listing for solid fuel. It fails at stove temperatures.
- Mixed Class A brands. Twist locks, diameters and jackets differ between manufacturers. A section forced into another brand leaves a gap in the insulation and voids the listing of the whole system.
- Wrong diameter. A 6 inch stove necked down to a 5 inch pipe to fit an old thimble, or an 8 inch masonry flue serving a 6 inch stove with no liner. Both hurt draft in thin Front Range air. Our flue size and appliance match guide covers the sizing rules.
Inspecting an Existing Stovepipe and Chimney Run
Here is the twenty minute walkthrough we do with a flashlight, a tape measure and a mirror.
- Identify what you have. Black pipe in the room is connector. Silver pipe with a visible double wall at the cut end is Class A. If black pipe enters a ceiling or wall with no support box or thimble trim ring, stop and book an inspection before burning.
- Measure clearances. Tape from the pipe to the nearest wall, ceiling, mantel, curtain and furniture. Compare against 18 inches for single wall or the label on double wall pipe. Darkened paint on drywall near the pipe means it has been running too hot.
- Check joint direction and screws. Crimps down, three screws per joint, no daylight at the seams.
- Trace the pipe above the ceiling. In the attic, confirm the insulation shield is in place and blown in insulation has not drifted against the pipe. Confirm it is Class A all the way to the roof, with no brand change partway up.
- Check the roof. Look for lifted flashing and hail dents, cracked storm collar sealant, and a rusted or plugged cap screen. Colorado hail can crush a cap screen flat and block draft. Our chimney cap repair and installation service handles that part.
- Have it swept before the season. Creosote in a Class A pipe is the fuel for the chimney fire the pipe was tested to survive once.
Anything you cannot see, including the inside of the pipe, is what a camera is for. A Level 2 chimney inspection runs a camera the full length of the system, and we recommend one any time a house changes hands or a stove is added.
When a Masonry Chimney Needs a Liner Instead of More Pipe
Many older Denver homes have a wood stove tied through a wall thimble into a masonry chimney built for a coal or oil furnace. In that setup the stovepipe is often fine and the chimney is the problem: cracked clay tiles or a flue far too large for a modern stove, which no change of connector will fix. The usual answer is a stainless liner sized to the stove, and our chimney lining service, the liner insulation guide and the EPA certified wood stove guide cover when a liner is needed and why. Loose mortar or spalling on the outside of the stack is a separate chimney repair question.
Frequently Asked Questions
Can I use stovepipe through the ceiling if I wrap it in insulation?
No. Wrapping connector in insulation makes it worse, because the pipe can no longer shed heat and the surface temperature climbs. Stovepipe has no listing for concealed spaces regardless of what is wrapped around it. The penetration needs a ceiling support box and Class A pipe.
Which way does the crimped end of stovepipe go?
Crimped end down, toward the stove. Each upper section slides inside the one below it so creosote and condensation drain back toward the firebox rather than out through the seams. Then fasten each joint with three screws.
Is double wall stovepipe worth the extra cost?
Usually, yes. The tighter clearance lets the stove sit closer to the wall, the pipe stays cooler to the touch, the flue gases stay warmer for better draft, and it tends to last longer.
Can I mix brands of Class A chimney pipe?
No. Each brand's locking system, diameters and insulation are tested as one assembly. Mixing sections or using another brand's support box or adapter voids the listing and usually leaves a physical gap. Match the brand and model already installed.
How much clearance does single wall stovepipe need?
The general NFPA 211 figure is 18 inches to combustibles in every direction. It can be reduced with a ventilated shield built per the standard or a listed pipe shield, often by up to two thirds, but only when the method is done exactly as specified. Drywall alone does not reduce clearance.
My stove connects to a brick chimney. Do I still need Class A pipe?
Not Class A, but the masonry flue must be sound and correctly sized. Many older Denver flues are cracked or far too large for a modern stove, and the right fix is a stainless liner run the full height of the chimney. The connector between the stove and the wall thimble is still ordinary stovepipe, kept in the open room at proper clearance.
Next Step: Have the Whole Run Looked At Before the First Fire
If you are not sure whether the black pipe in your basement stops at the ceiling or goes through it, that is worth a call. We will identify what you have, measure clearances, camera the flue, and tell you plainly whether it needs three screws or a new liner. Pricing for inspections, sweeping, lining and repairs is listed on our chimney and fireplace pricing page. Call Adam Chimney Sweep at (720) 207-9232 or use the contact page to book an inspection anywhere in the Denver metro and along the Front Range.